Building Projects with PVC Pipe
Welcome!
We hope this guide is friendly and knowledgeable and provides help and solutions to people from all settings and backgrounds. Whether you're a first-time PVC builder, who has never picked up any tool, or a seasoned PVC enthusiast or maker who uses PVC in everyday ideas and activities, this guide should provide a general manual for assembling PVC pipe projects.
What is the best way to assemble a PVC project?
Much of that will depend upon how you plan to build your structure and how it will be used. Factors such as the size of your project, whether it will bear weight, if it needs to be disassembled after use, and ease of assembly for your customers or users will all affect your chosen method. We recommend reviewing each PVC assembly option below to help you determine the ideal way to assemble PVC pipe projects for your plan or application.
If we can't answer your questions here, don't hesitate to contact our support team via our Contact Us page. We'll be glad to help.
Assembling PVC Pipe Summary
Structural PVC projects offer a unique advantage in assembly compared to traditional materials like wood or metal. Instead of relying solely on fasteners such as screws or nails, PVC is connected using diverse methods depending on your application or performance.
First, we'll cover all the basics of assembly, like important safety directions. Then, we'll get into what methods are available to connect PVC pipe and fittings; finally, we'll show examples of how to perform each method to assemble your PVC project.
Safety First

Important!
Some methods to attach PVC pipe to PVC fittings involve high-speed drills and power tools. Chemicals are also used to fusion weld PVC pipe together. Each of these can cause serious harm to an individual if not used properly. Read, understand, and follow all the safety instructions for your hand or power tools and chemicals.

Hands
Always be aware of where your hands are when drilling PVC pipe with any tool. Make sure that your hands are clear of the area being drilled.

Eyes
When drilling or inserting screws into PVC pipe, always wear safety glasses or goggles. This protects your eyes from potential pipe fragments or loose screws.

Lungs
Wear a mask or respirator. PVC pipe, when drilled, can emit small particles that can irritate the lungs or throat. PVC cement is also noxious when used and may irritate the lungs.
PVC Assembly Methods
PVC pipe is a remarkably versatile and practical material for structural building. Its adaptability and functionality are great, but the root of any PVC-based project lies in how you connect pipe to fittings. We've outlined several methods for assembling your PVC project to guide you through this essential phase.
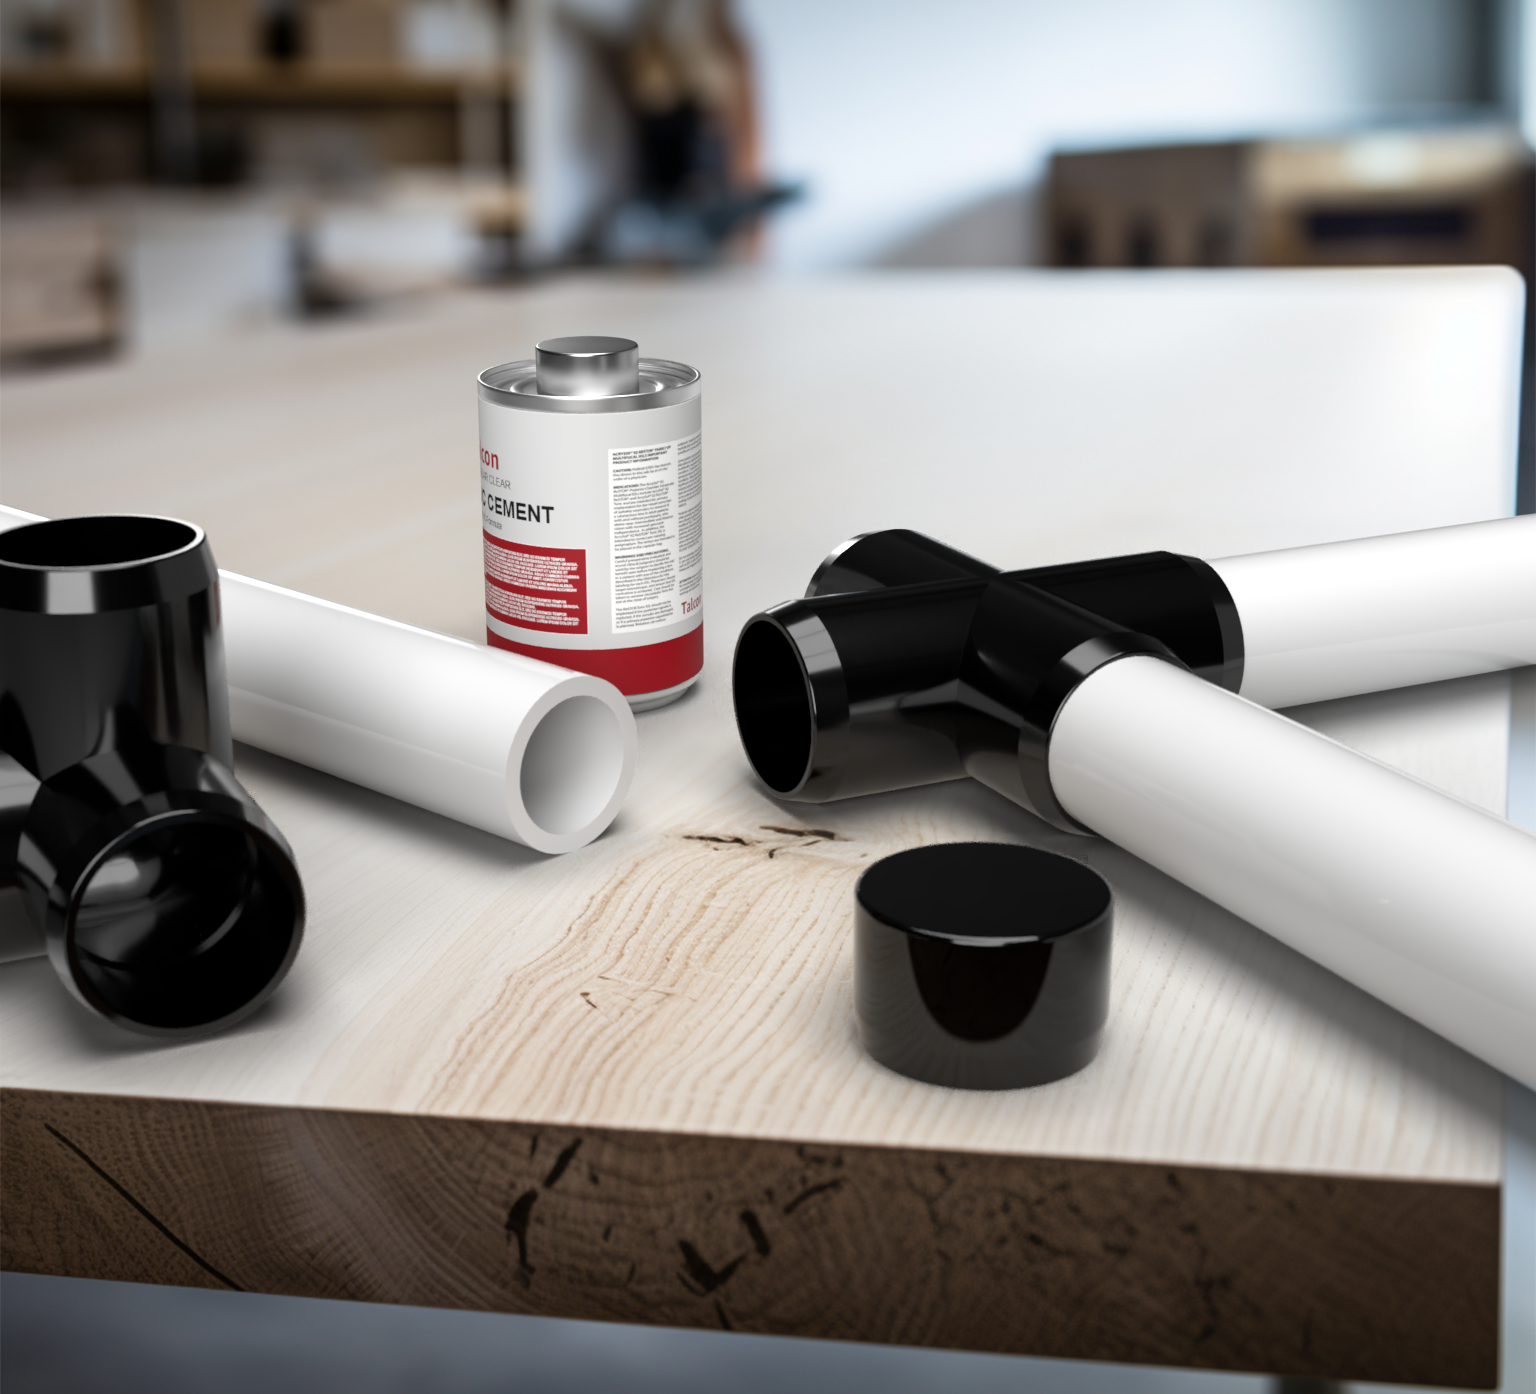
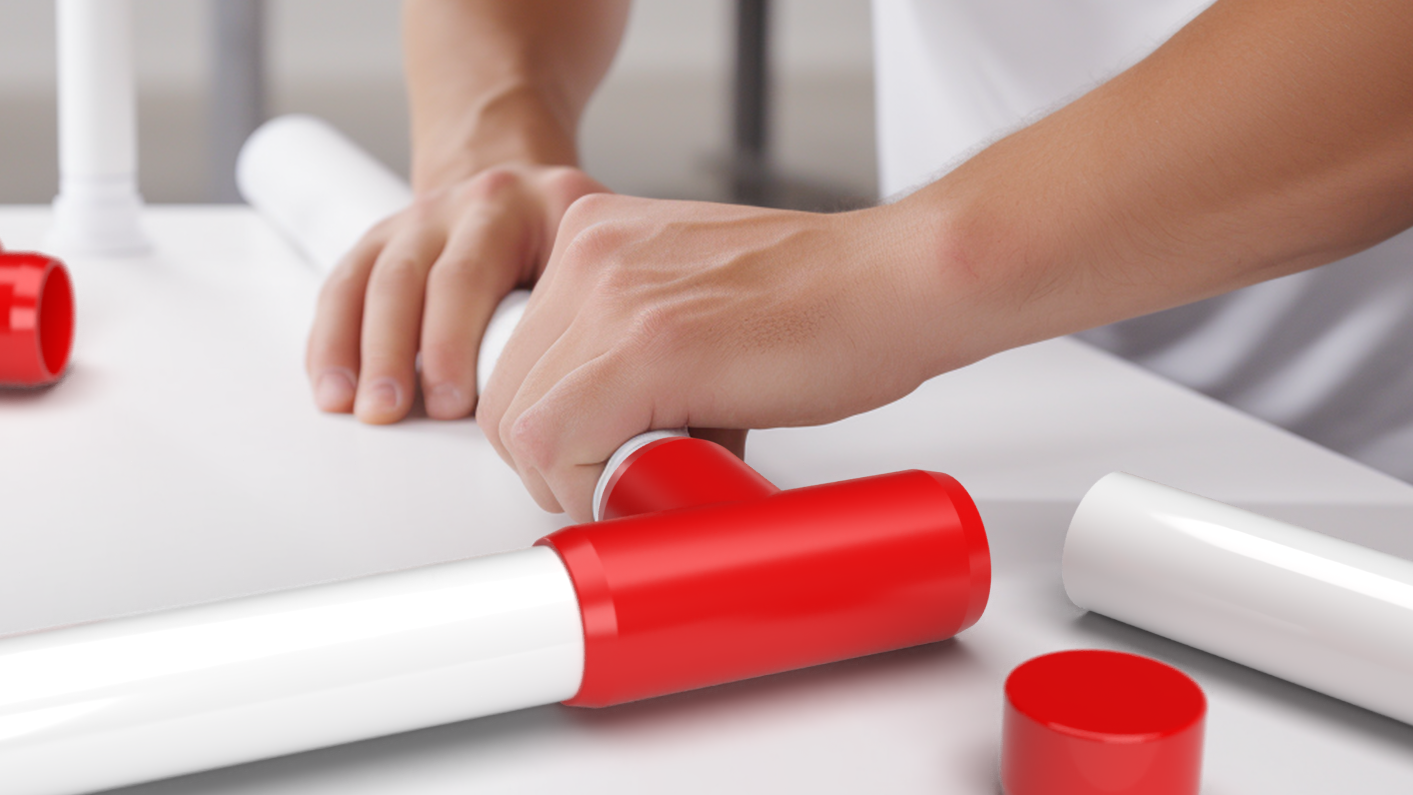
PVC Cement Method
Plumbing and electrical experts often use PVC cement to bond PVC pipes to fittings, creating a robust and permanent connection. This approach is called fusion welding or chemical welding because the cement initiates a reaction that melds the PVC's outer layers together. Once joined, they're inseparable. Quick action is crucial during this process, as the bond typically solidifies in 30 seconds or less, allowing little time for any adjustments.
Fastener Method
The fastener method offers an alternative to PVC cement for structural PVC projects, which may be too much for some users. This method inserts various fasteners between the PVC pipe and fitting to hold them together. Self-tapping machine screws, plastic rivets, or quick-release pins will also work, but pre-drilling holes for these screws are essential. This method isn't ideal if your structure will handle significant torque regularly, as the screws could potentially de-thread and loosen under load.
Push & Set Method
The push-and-set method keeps things in place using the tolerances of the pipe and fitting connection. Furniture-Grade PVC pipe and fittings have close tolerances, so this method is often the only thing needed to assemble a PVC structure. Please note that some fittings and accessories require PVC cement to connect, so this method will not work. This approach works best for light or self-standing structures bearing only a small amount of weight or torque.
Essential PVC Assembly Strategies
Some description

Dry Fitting
Dry fitting is the practice of temporarily assembling PVC components. This crucial step ensures that pipes have been accurately cut and fittings are correctly positioned.
When using PVC cement, a dry fit is vital—the cement cures in about 30 seconds, leaving no room for error. There's a risk of misusing the wrong pipe length or fitting, leading to potential project setbacks.
Apply baby powder inside the fittings to make disassembling the PVC easier. Clean off any residue before applying cement. To detach the pipe from fitting post-dry fit, twist the pipe either by hand or with a strap wrench.
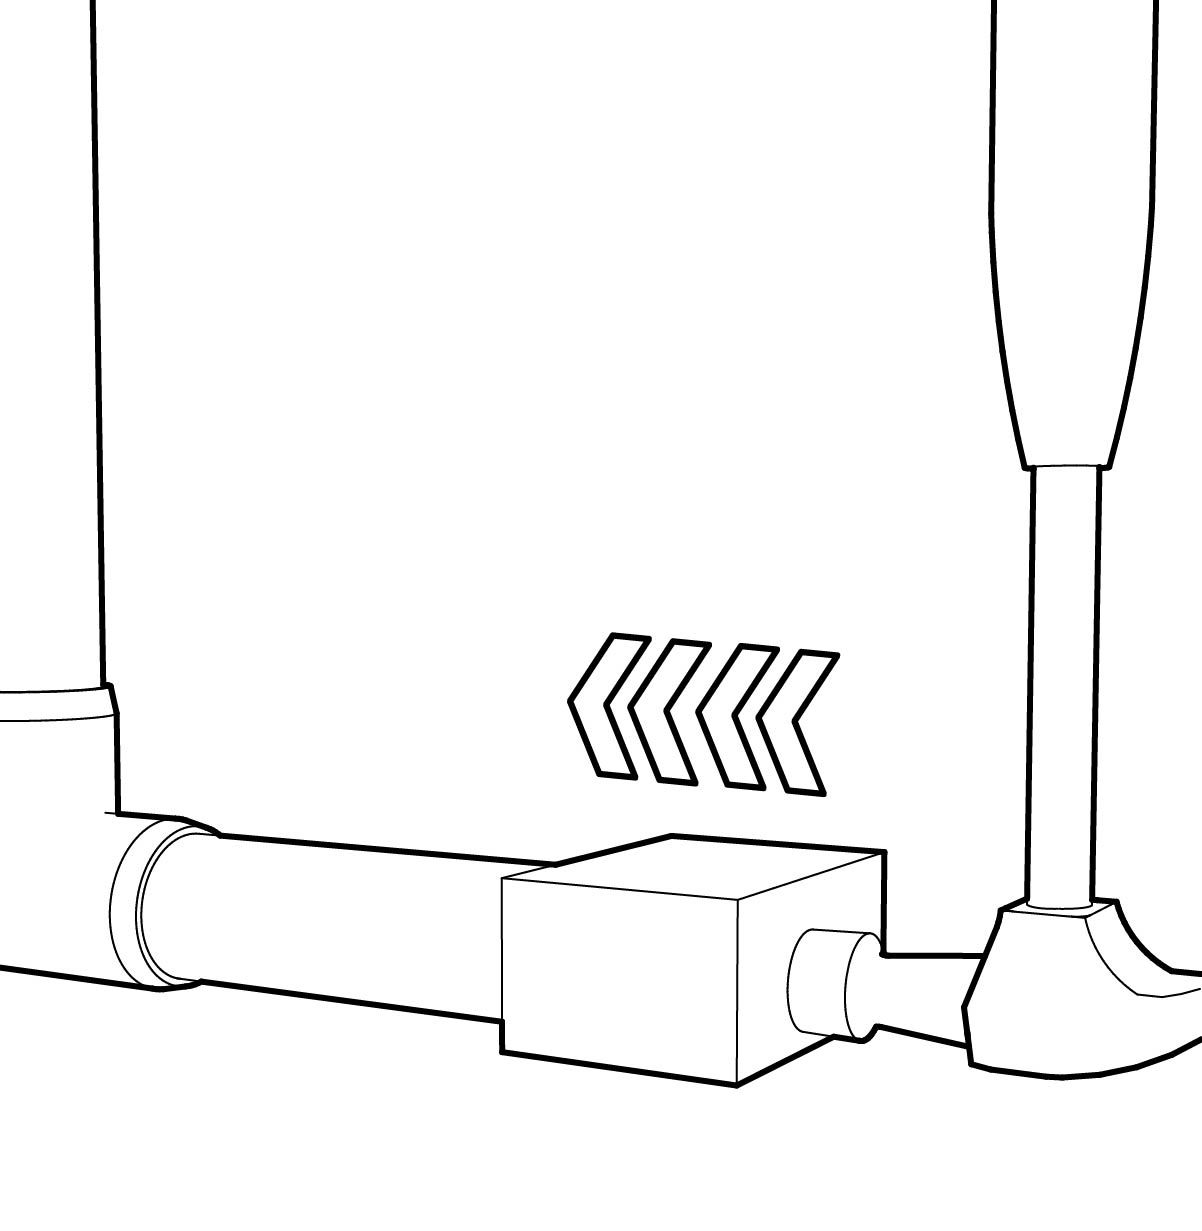
Pipe Seating
Seating ensures the PVC pipe sits fully into the fitting during assembly. Proper seating guarantees the pipe aligns correctly with the fitting's inner 'detent' or lip.
Use a rubber mallet or combine a wood block and hammer to gently tap the PVC pipe's opposite end until it touches the detent.
As you tap, the pipe should move deeper into the fitting and halt when aligned with the detent. It will also make a different sound when tapping and fully seated.
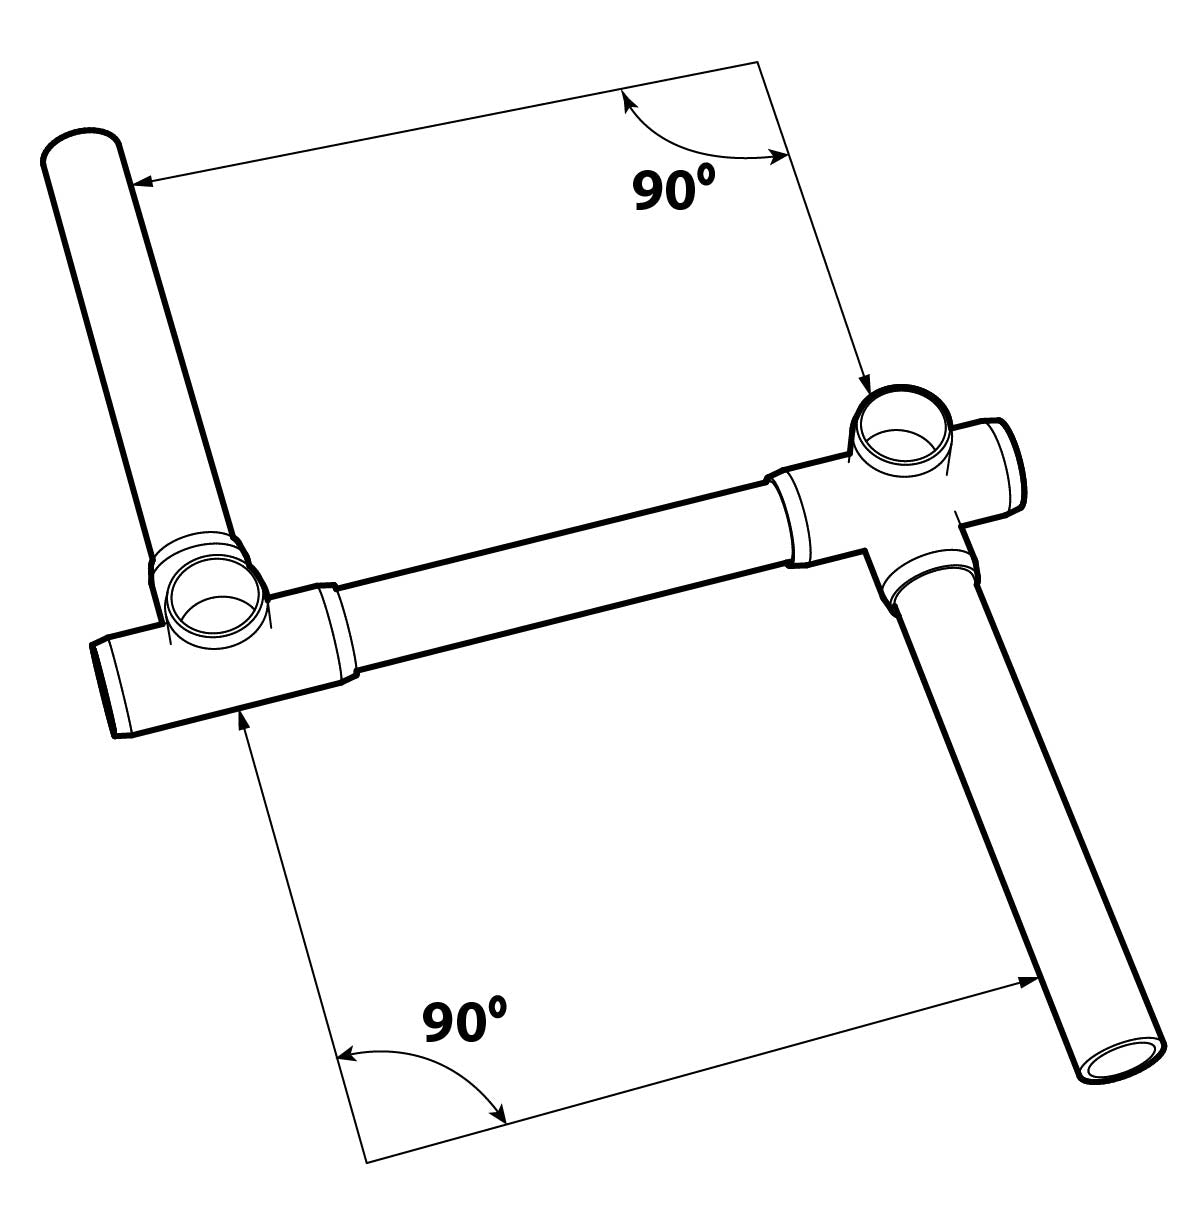
Check for Square
As you assemble, checking that your PVC structure is perfectly square is crucial, especially for constructions that need parallel and perpendicular alignments, not guided by a specialty fitting. When using cement, you should make any adjustments within 30 seconds of application. For the fastener technique, you should confirm squareness before drilling pilot holes.
Lay the structure flat, pressing down on its components to level them.
Use a straight-edge tool to compare and adjust perpendicular sections.
Position your structure on a leveled surface and utilize a bubble level to ensure its evenness.
Assembling Projects with PVC Cement
⚠️ WARNING: The PVC cement method is permanent, and you cannot remove the PVC pipe from the fitting after 30 seconds. Be sure to perform a dry fit to ensure all pipes are cut correctly. If necessary, verify that your items are square immediately after seating.
‼️ CAUTION: Be sure to perform all activities with PVC cement in a well-ventilated area.
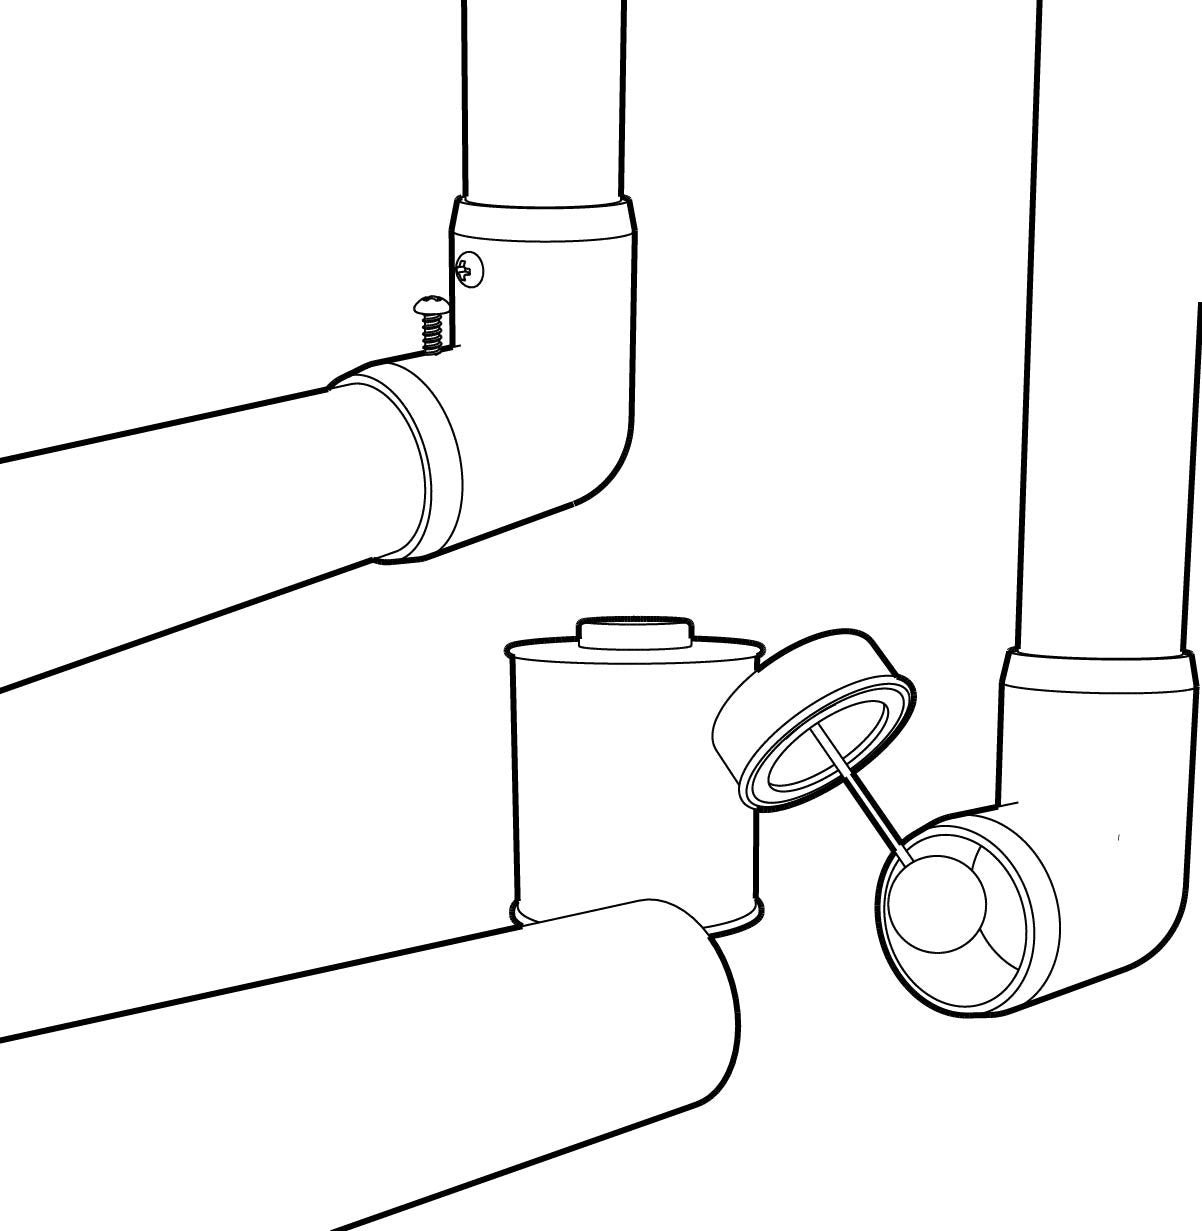
PVC Cement Steps
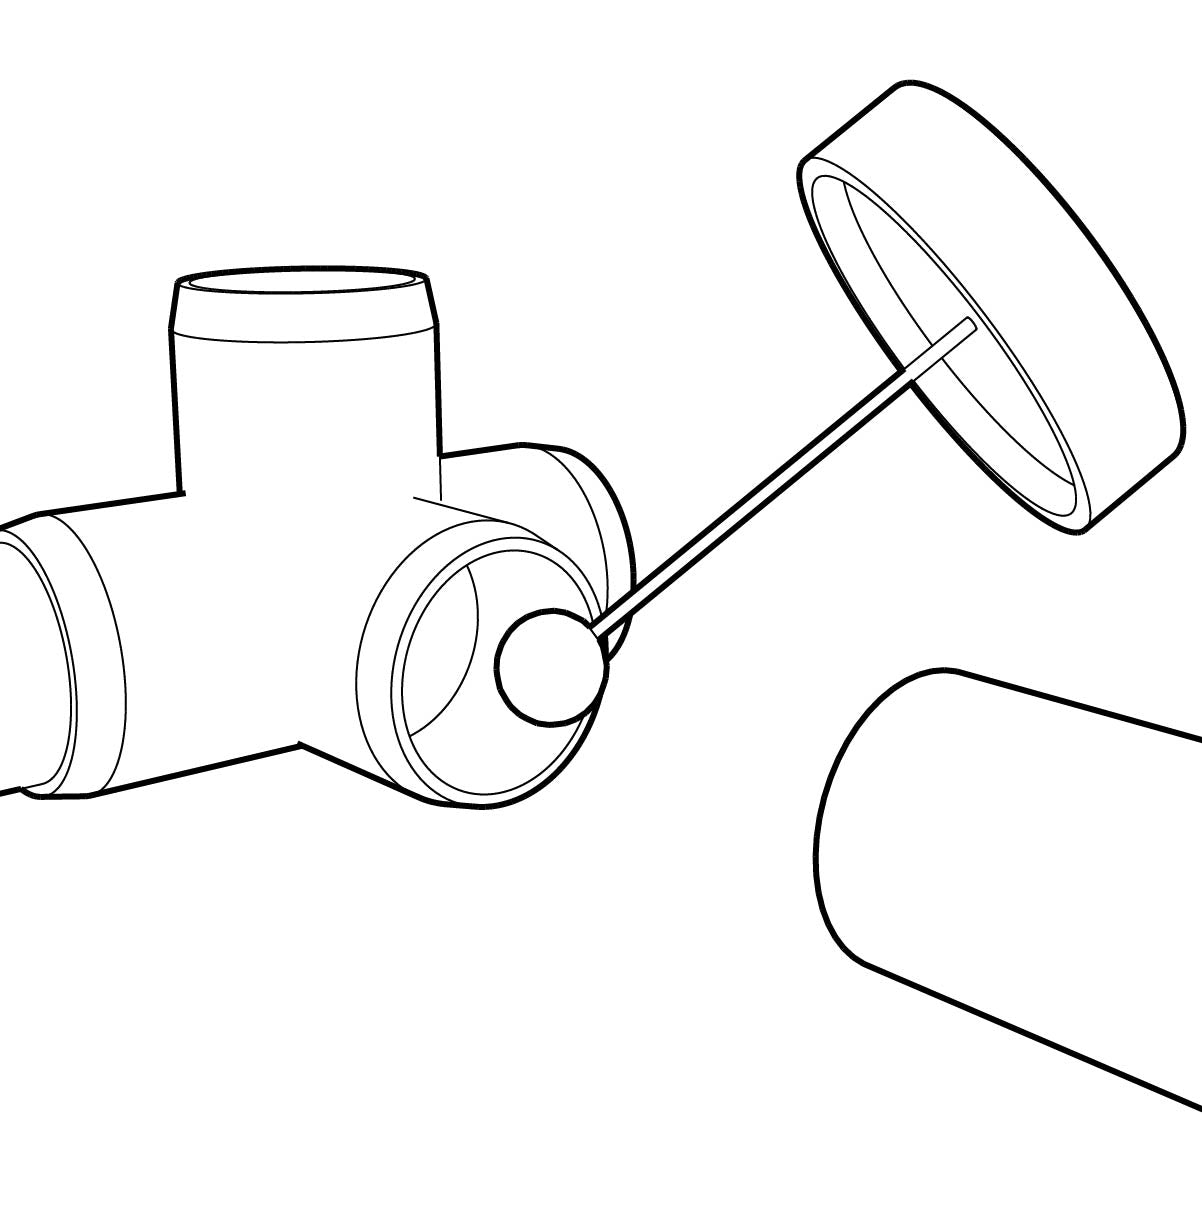
Apply PVC Cement
Using the PVC cement dauber inside the can, apply a small amount of PVC cement to the inside of the fitting and the very end of the outer diameter of the PVC pipe. Apply the cement only to where the fitting and pipe will come into contact.
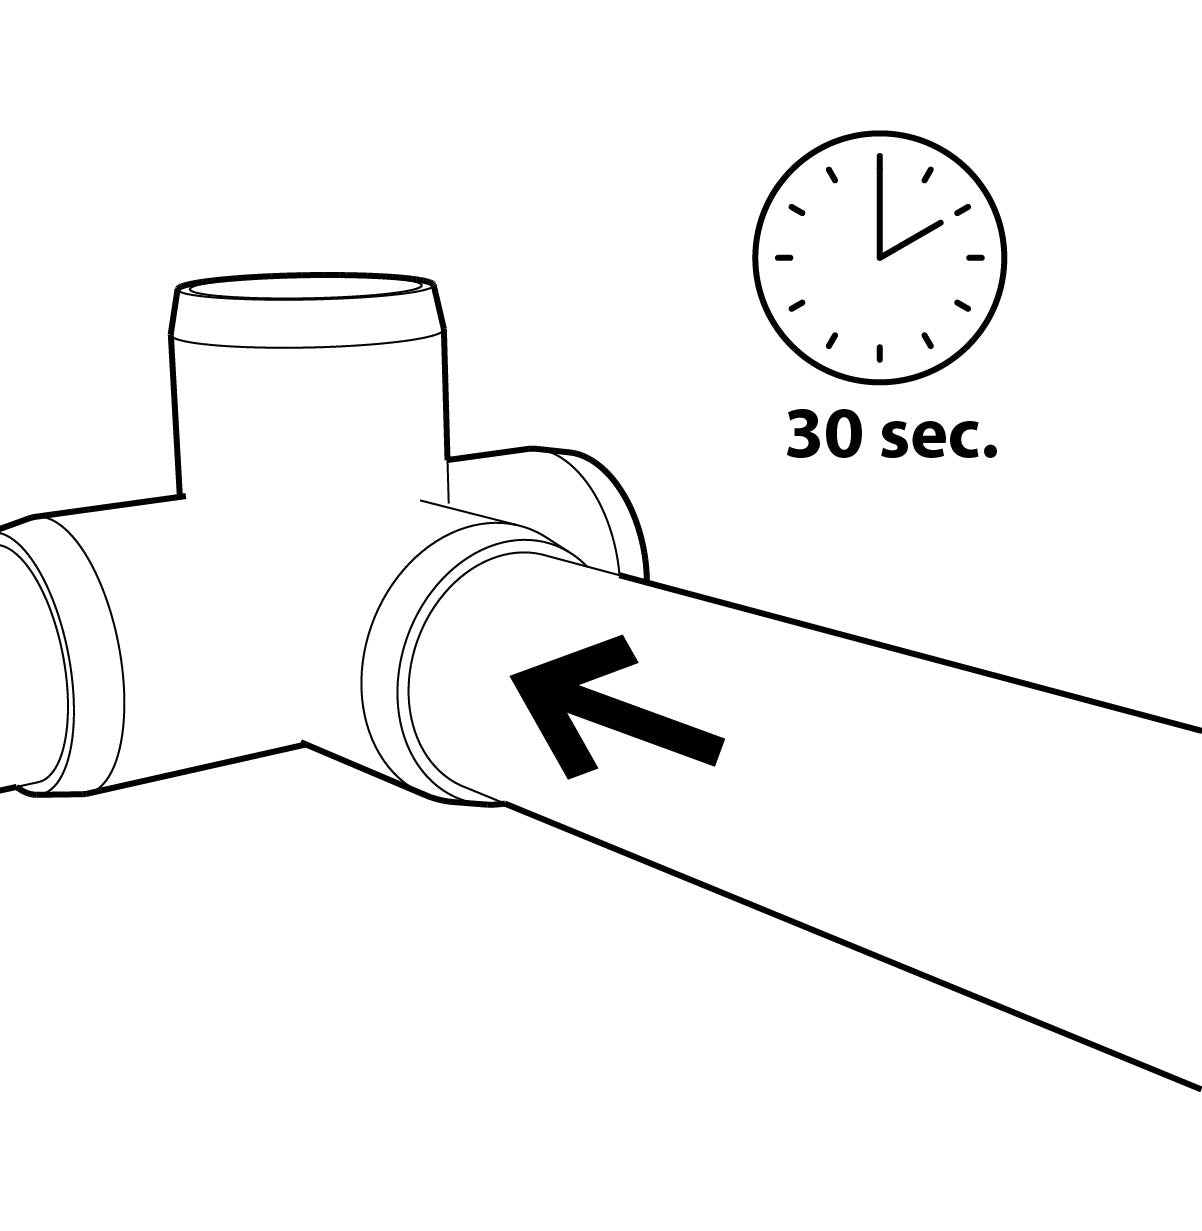
Seat the PVC Pipe
Quickly insert the pipe into the fitting, ensuring it is seated fully, to the point of impacting the detent in the fitting. Check for squareness, if required, and hold the pipe and fitting together firmly for 30 seconds.
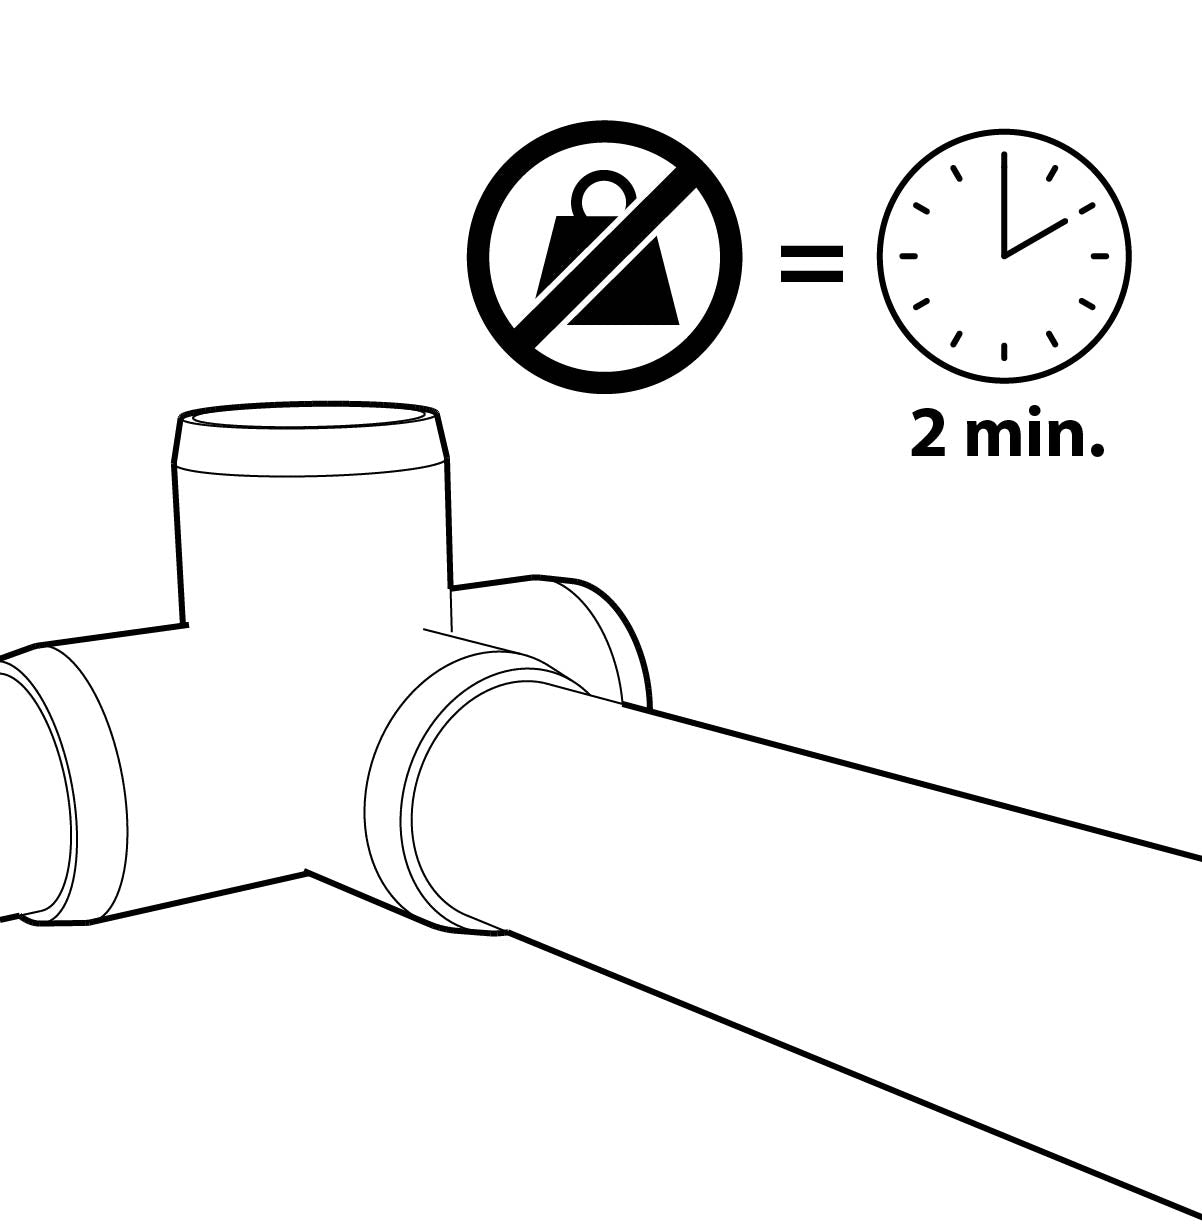
Allow to Cure
Allow the pipe and fitting connection to set for at least two (2) minutes before putting weight or additional load onto it. This cure period will allow the remaining cement to evaporate. While waiting for the cure time to complete, you can join other fittings within the structure.
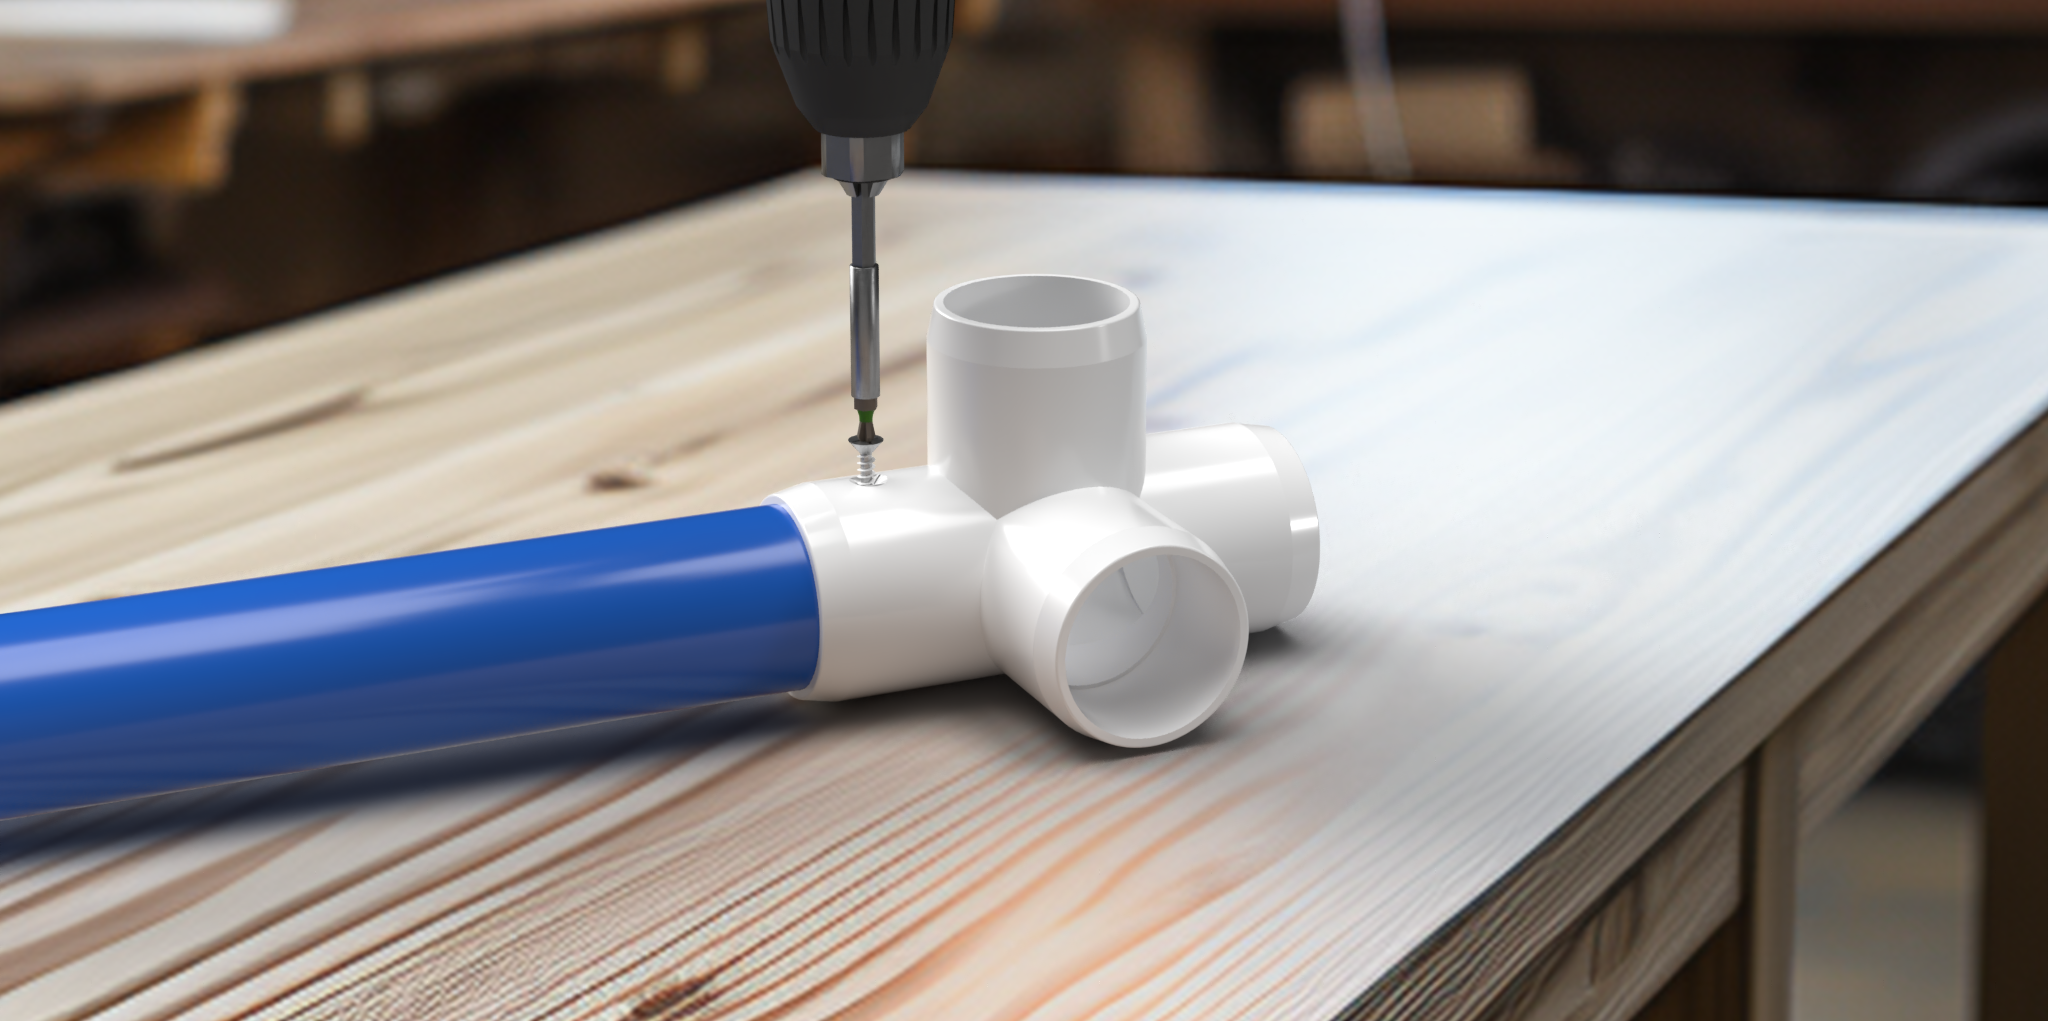
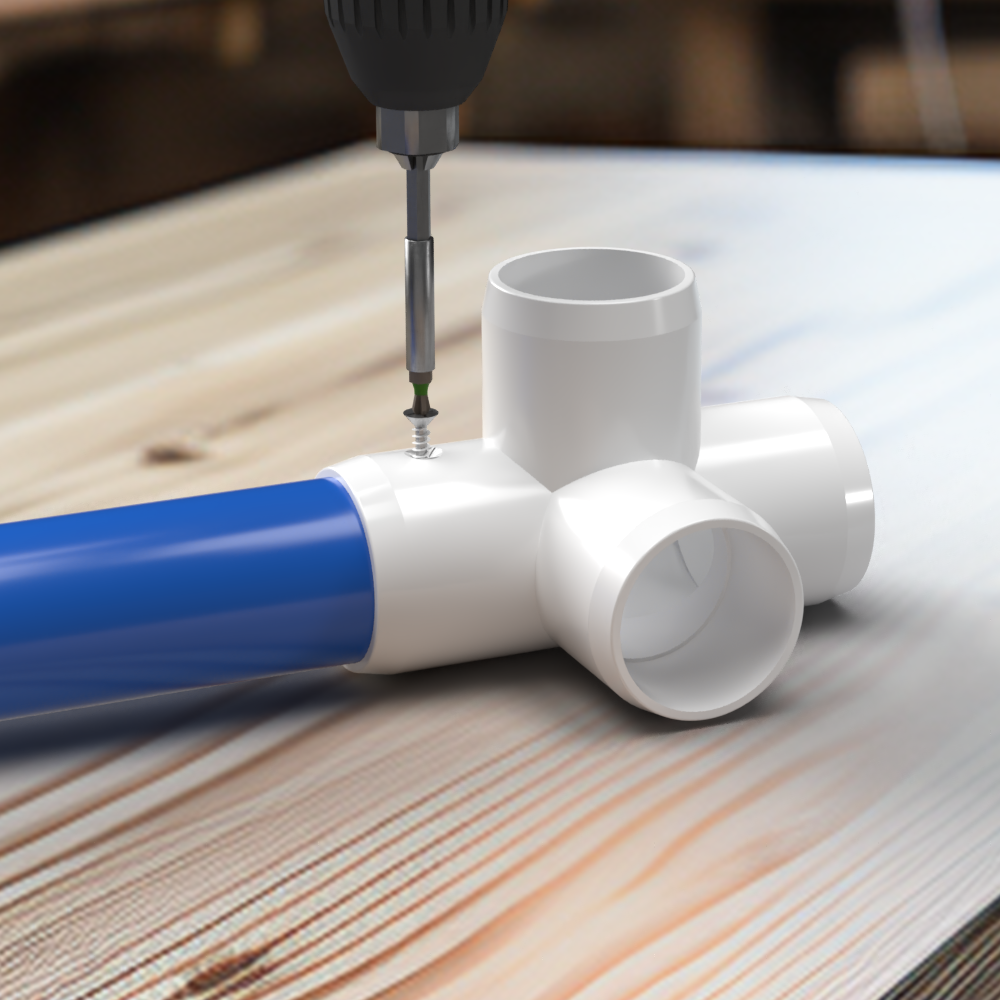
Assembling PVC with Fasteners
⚠️ WARNING: Do not use this method in scenarios where it is expected to receive high torque or movement. This additional load may cause the screws to de-thread and come loose.
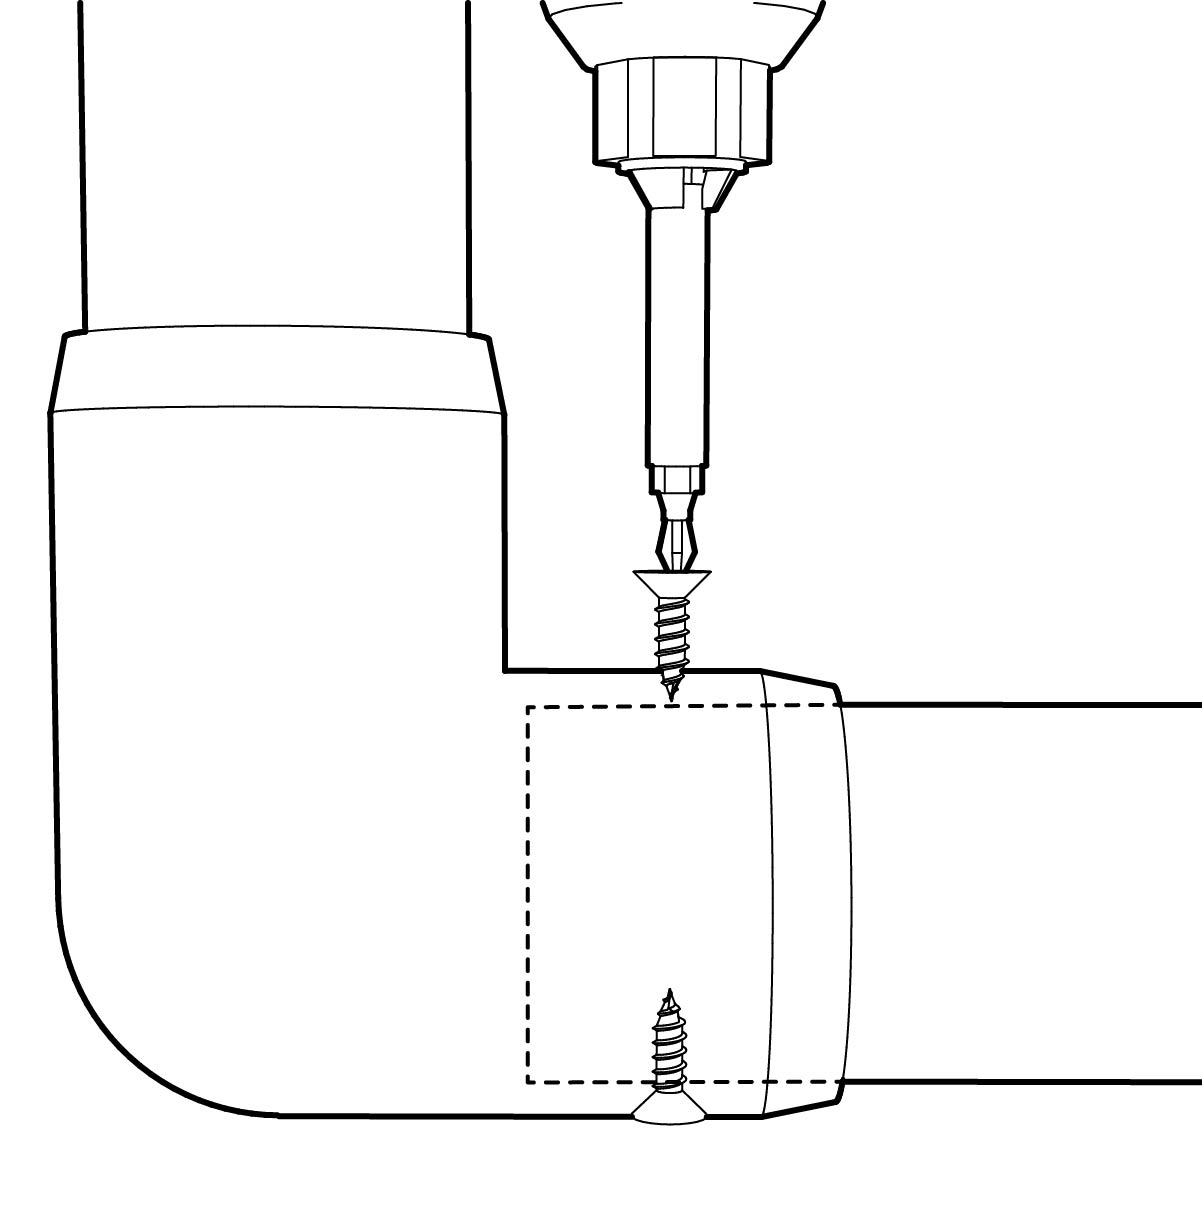
Screw Fastener Steps
Insert PVC Pipe
Insert the pipe into the fitting. Use a rubber mallet or a piece of wood and hammer to tap the pipe until it is properly seated and reaches the detent inside the fitting.
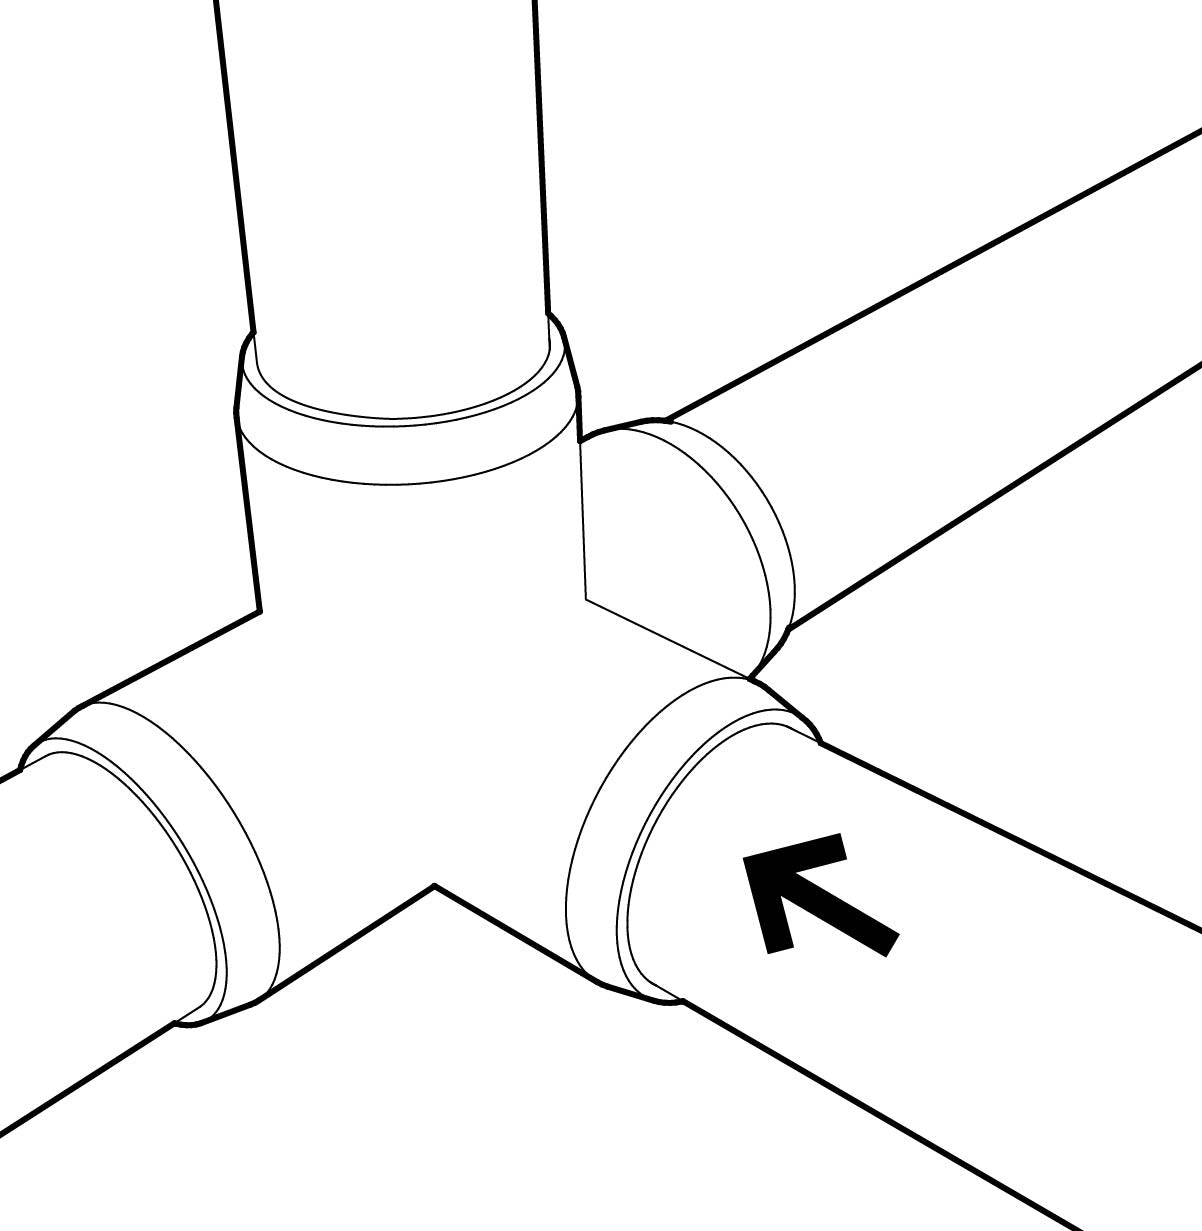
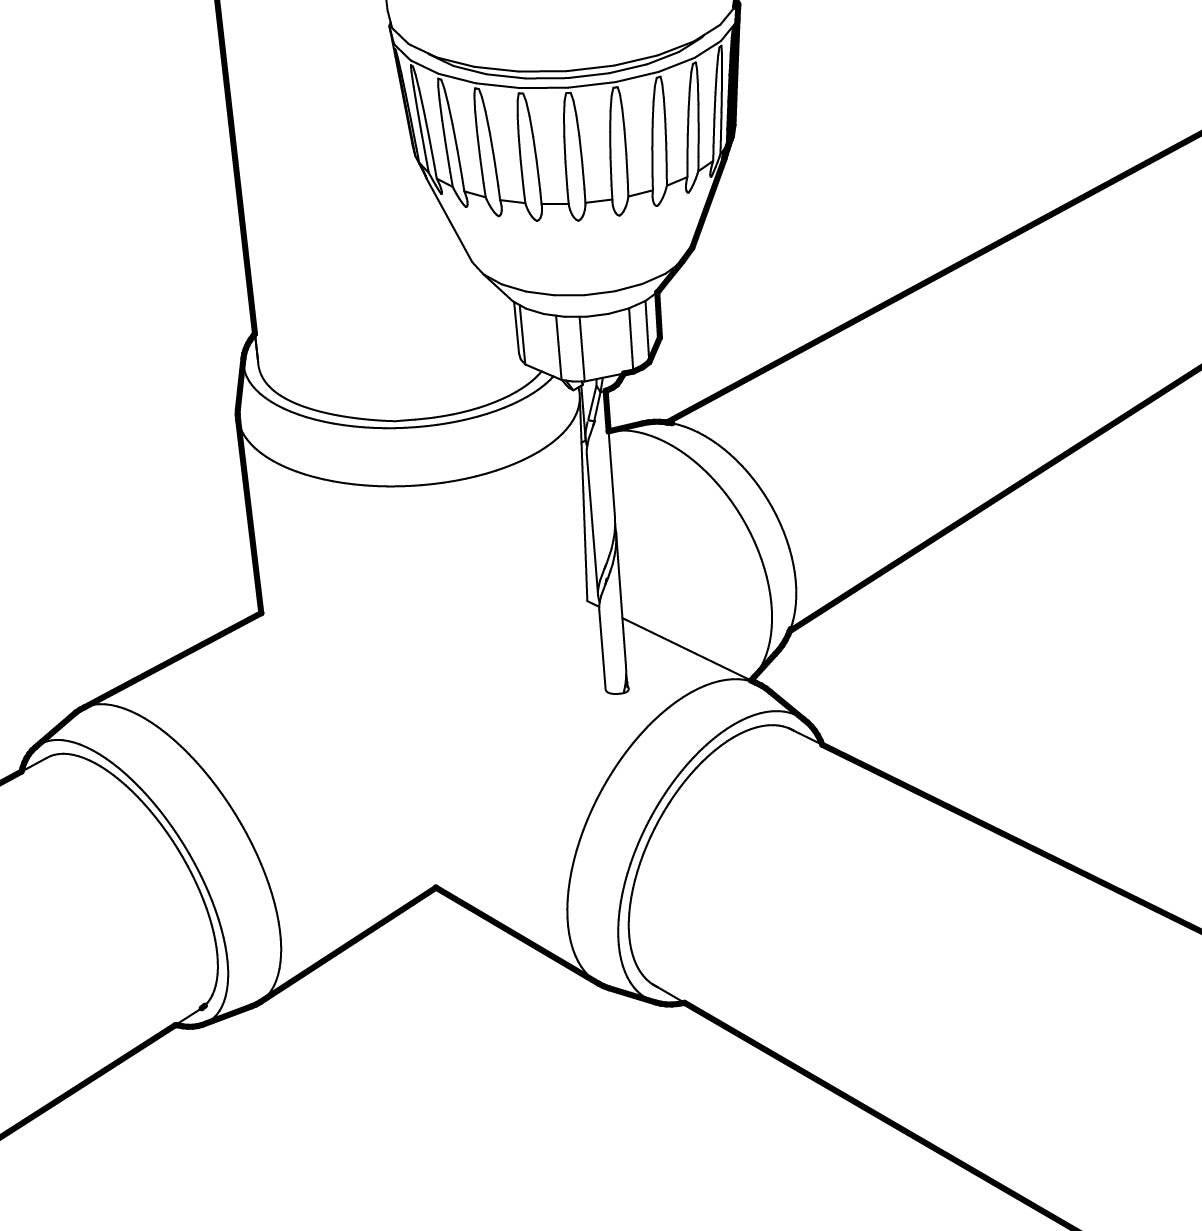
Drill a Pilot Hole
On one side, drill a small hole approximately 1/2 to 3/4 of an inch from the open socket end of the fitting. Be sure to drill the hole through both the fitting and the pipe.
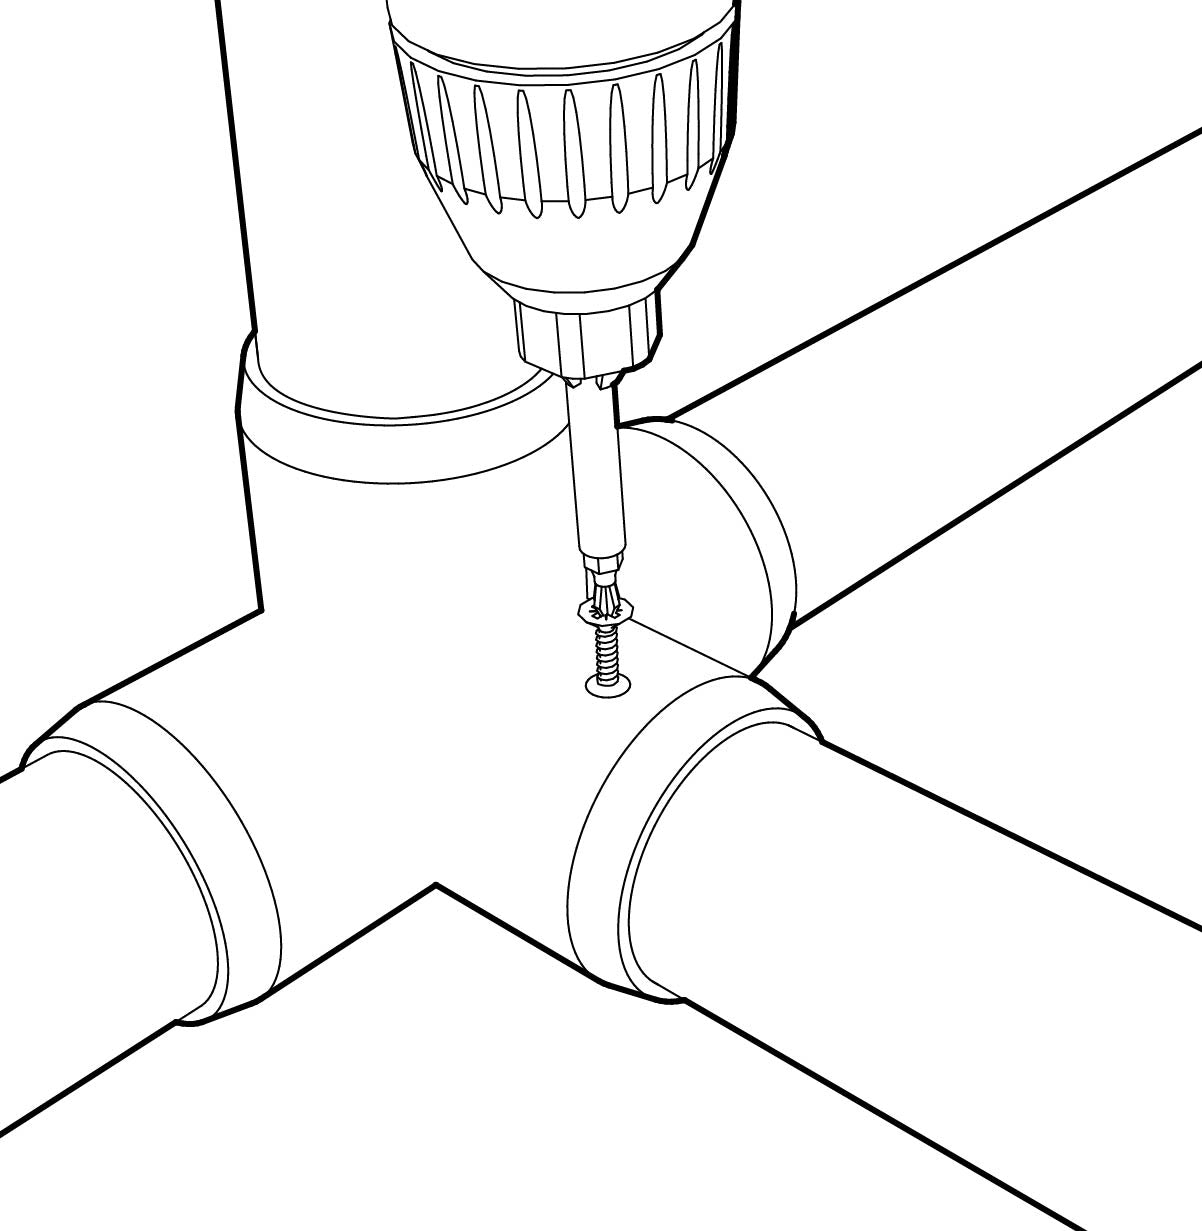
Drive the Screw
Locate the pre-drilled hole on the fitting, then drive the screw into the hole and ensure that it goes through the fitting and the pipe, applying enough pressure to fasten them together securely. Use a screwdriver or drill to turn the screw as needed, but be careful not to over-tighten the screw and risk damaging the fitting or pipe.
Add More Screws (optional)
To ensure a stronger and more reliable connection, it is recommended that the previous process be performed on the opposite side of the pipe and fitting joint as well. This will provide additional reinforcement and minimize the risk of potential loosenging or breakages.
Assembling Projects with the Push & Set Method
⚠️ CAUTION: This method should never bear heavy weight or medium torque movement and should be considered a temporary solution until cemented or fastened.
Push and Set Method Steps
Insert PVC Pipe
Insert the pipe into the fitting. Use a rubber mallet or a piece of wood and hammer to tap the pipe until it is properly seated and reaches the detent inside the fitting.
Check for Security
Repeat the above process until all items have been assembled. If the pipe is loose, this option is not ideal - secure with PVC cement or screws if the desired result is permanent.
FORMUFIT Support
If you've read this guide and still have questions, feel free to contact us. We are constantly revising our documents and website with information provided by users just like you.
Contact Us
If you want to contact us with questions or suggestions, please reach out to us via our Contact Us page. We'll be glad to help with any questions related to assembling PVC pipe structures that you might have. We've got a lot more guides where this one came from, which are available in our FORMUFIT Guides section.
Legal Disclaimer
The information contained in this manual is provided for general informational purposes only. FORMUFIT LC assumes no responsibility and disclaims all liability for any damage, loss, or injury arising from the use of, or reliance on, this information. This includes, but is not limited to, loss of profits, business interruption, loss of opportunity, indirect, incidental, special, or consequential damages, as well as personal injury or loss of life.